In this post I will detail how to create a Windows Forms application that hosts a simple list control. The list control is akin to the ListBox control but developed from scratch. This tutorial will start with basics, creating the necessary control(s), painting and so on. The tutorial will then discuss slightly more advanced topics such as scrolling, paint optimisation, selection and so on.
In this post
Project Creation
We will create a WinForms project to host the simple list control. For this project I am using Visual Studio Community Edition 2022. The project targets .NET Framework 4.8.
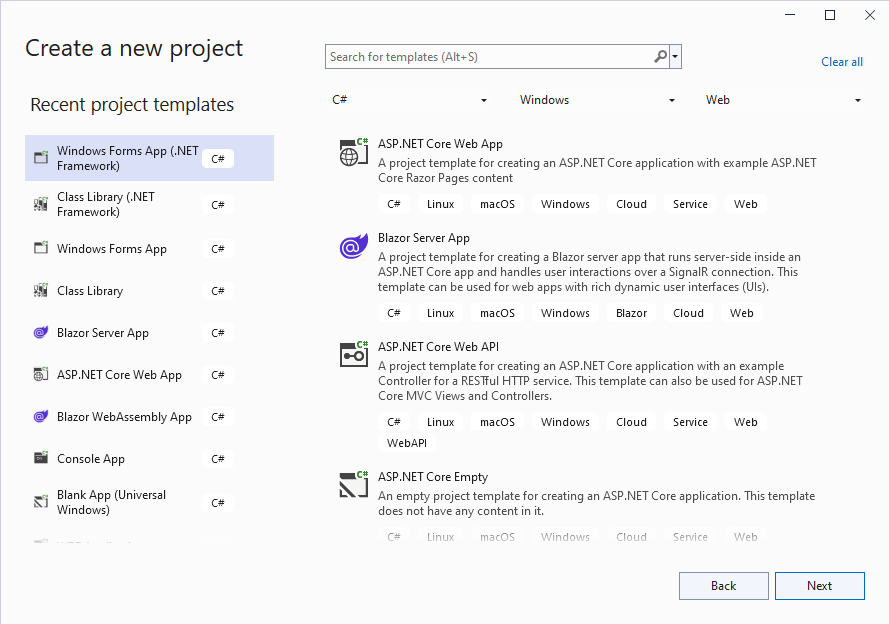
1. Create a new Winforms project (.NET Framework).
Figure 1 - Creating the project
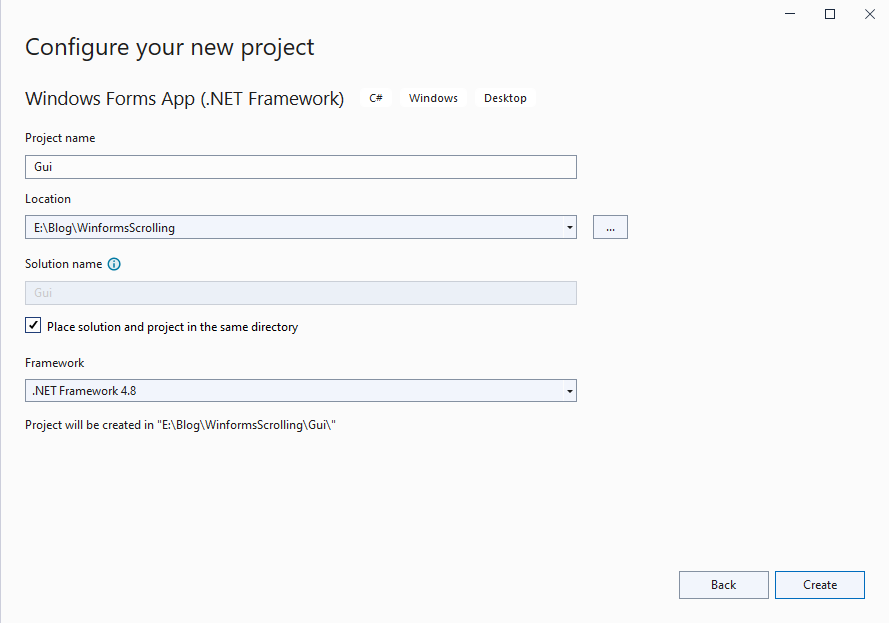
2. Configure the project.
Figure 2 - Configuring the project
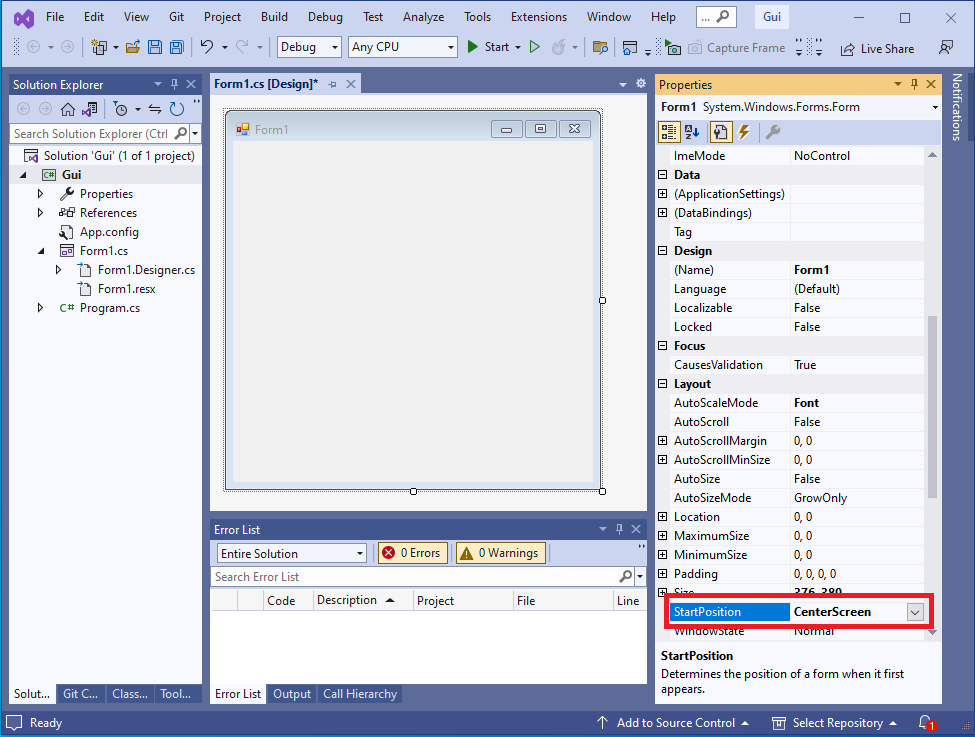
3. Configure the main form properties.
This step is optional, the defaults will suffice. I prefer to ensure that the form will display center screen.
A User Control will be used to host the simple list control. The control will implement painting, scrolling, selection and so on.
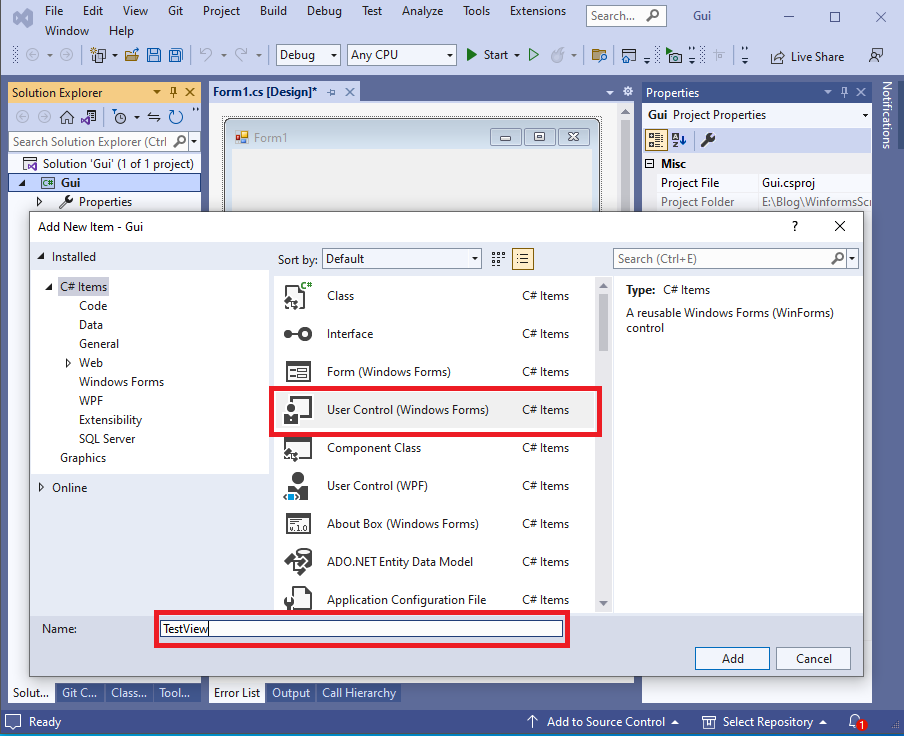
1. Add a new user control
Figure 4 - Add a new user control
2. Name the user control
I've chosen to name the control TestView. You can name the control anything you wish. However, you will need to make changes to subsequent code to reflect your chosen name.
Figure 5 - Name the new user control
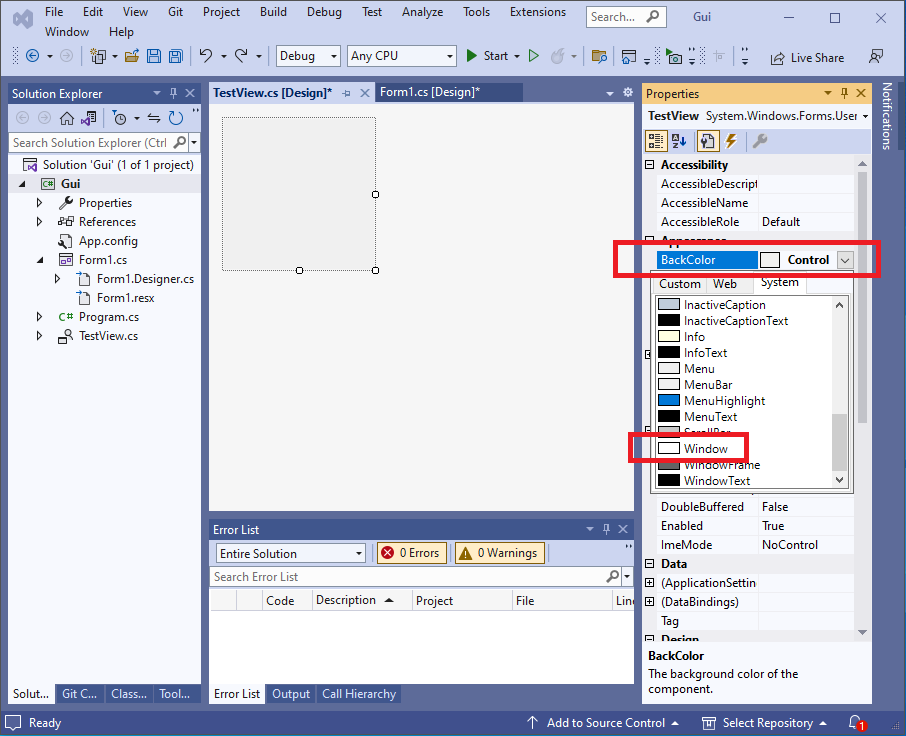
3. Configure the user control
To configure the user control, simply change the background colour to Window (default colour being white).
1. First build the project to ensure the the user control is ready for use.
In Solution Explorer, right-click the Gui project the select build or press the F6 key.
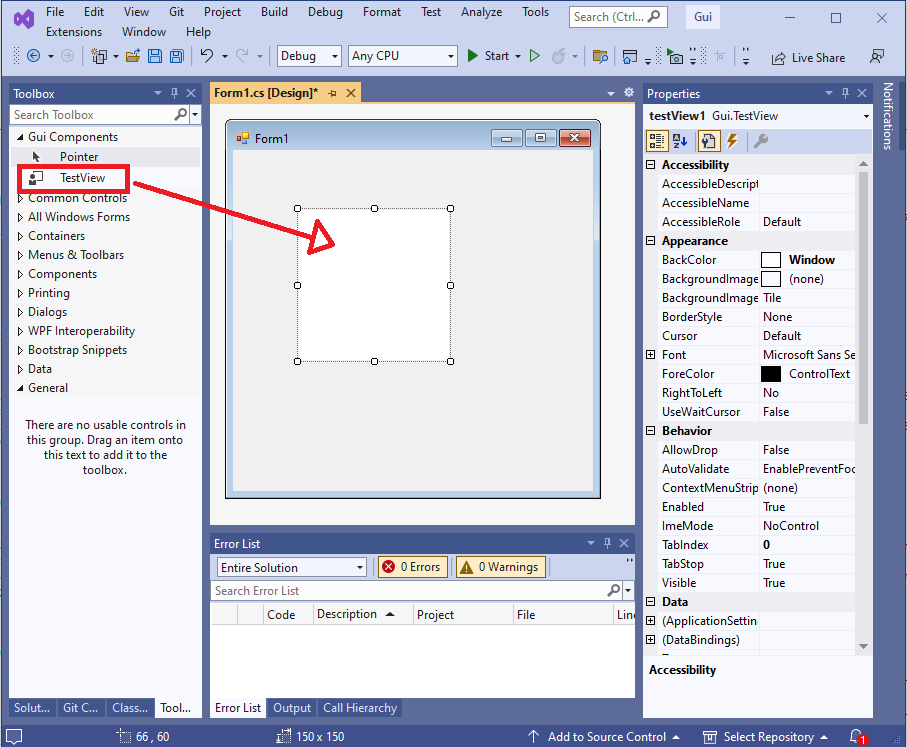
2. Switch to the Toolbox tab and drag the TestView component to the main form.
Figure 7 - Main form hosting the user control
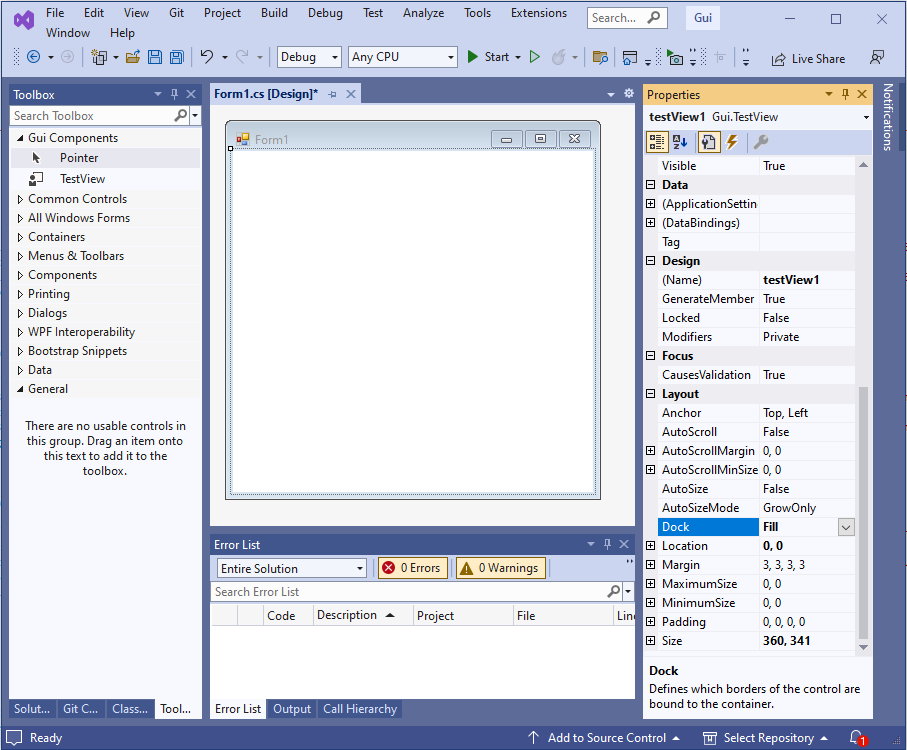
3. Finally, select the user control then select the dock property and change to Fill.
In this post I described the initial steps for creating a simple list control.
To ensure the post does not become to long, I concentrated on creating and configuring the project.
I then proceeded to add a user control that will house the list control's functionality.
In the next post we will start writing code to implement list view functionality.
Typically, all painting in a WinForms control is performed by responding to the Paint event.
In a derived control overriding the OnPaint method achieves the same result.
ALL painting should occur within the OnPaint method.
Whilst creating a graphics context within a control is possible, it is generally frowned upon.
Windows raises a paint event whenever a control is resized, or a portion is uncovered, say, after moving another window over the control.
It is also possible to cause Windows to raise the paint event manually, by calling the control's Invalidate method.
Calling Invalidate will force an entire client area repaint.
It is also possible to force a smaller area to be repainted by passing a rectangle to the Invalidate method.
A control conists of zero or more non-client areas and a client areas.
Non-client areas include items such as borders, scroll bars and so on.
Certain controls perform custom non-client painting. One such example is the list view control that draws column header cells within the non-client area.
For our simple control we will only be painting within the client area.
Figure 1 - Client and non-client areas
For the simple list control, we will simply paint all available rows whenever a paint request is received.
Whilst this is a somewhat naive approach, it serves as a decent starting point.
Switch to the solution tab and select the TestView.cs item. Right-click, then select View Code (or press F7) to view the auto-generated code.
You should see something like the following (I removed unused usings for brevity).
using System.Windows.Forms;
using System.Drawing;

namespace Gui
{
  public partial class TestView : UserControl
  {
    public TestView()
    {
      InitializeComponent();
    }
  }
}
Before we can paint any rows, we need some data.
To keep things simple, we can add a class method to add sample rows.
I will call this new method, AppendSampleRows.
We can then override the OnLoad method to call this method and add rows. We also need to maintain a reference to the rows within the control. A list of strings will suffice for now. Let's call this class member variable, _rows.
The following code illustrates the idea.
using System;
using System.Collections.Generic;
using System.Drawing;
using System.Windows.Forms;

namespace Gui
{
  public partial class TestView : UserControl
  {
    private List<string> _rows = new List<string>();

    public TestView()
    {
      InitializeComponent();
    }

    public static void AppendSampleRows(int count)
    {
      for (int i=0; i<count; i++)
        AppendRow($"Row {i}");
    }

    protected override void OnLoad(EventArgs e)
    {
      _rowData = GenerateRowData(30);
    }
  }
}
Code walkthrough...
1. Introduce a class member variable, _rows, this will maintain a list of rows to be painted.
2. Introduce a class method, AppendSampleRows, to add sample row data.
3. Override the OnLoad method and call the AppendSampleRows method.
Now, we can finally override OnPaint to paint the rows.
Modify the code so that it looks like the following...
using System;
using System.Collections.Generic;
using System.Drawing;
using System.Runtime.CompilerServices;
using System.Windows.Forms;

namespace Gui
{
  public partial class TestView : UserControl
  {
    private IEnumerable<string> _rowData = new string[0];

    public TestView()
    {
      InitializeComponent();
    }

    public static void AppendSampleRows(int count)
    {
      for (int i=0; i<count; i++)
        AppendRow($"Row {i}");
    }

    protected override void OnLoad(EventArgs e)
    {
      _rowData = GenerateRowData(30);
    }

    protected override void OnPaint(PaintEventArgs e)
    {
      Graphics g = e.Graphics;
      Rectangle rcRow = ClientRectangle;
      int rowHeight = Font.Height;
      rcRow.Height = rowHeight;

      foreach (string rowText in _rowData)
      {
        g.DrawString(rowText, Font, Brushes.Black, rcRow);
        rcRow.Y += rowHeight;
      }
    }
  }
}
Build the project and run it (F5 for debug run, or CTRL + F5).
You should see the following...
Figure 2 - First Run
Try resizing the window. You will notice there are no scroll bars. To view all rows, you essentially have to maximise the window.
Still, it is about small incremental steps, learning as you go along.
You can also modify the count in the GenerateRowData method.
Don't expect any surprises, still, it can be useful to experiment.
So, at this point we have a simple control that can display rows of data. Let's do a code walk through.
1. We added a _rows variable that maintains a list of rows to be painted.
2. We added an AppendSampleRows method, which expects a count parameter.
This method simply generates strings that our control can display.
We generate text that results in row{N}, where N is the row number, this will prove useful for debugging purposes.
3. The OnPaint method was overridden to draw the individual rows.
The implementation can be broken down as follows...
Create a temp variable 'g', to hold a reference to the graphics context, saves subsequent typing.
Drawing occurs within the client area, rcRow will track each row bounding rectangle as we proceed to draw rows.
We use the control's font height to specify the row height. Simplistic, but will suffice for a starting point.
As each row is of a fixed height, we set the initial height and can simplay walk through each row, adding the row height after each row.