Saturday, 3 February 2024

Use C# To Access Blog (Blogger.com)

Overview

Blogger.com offers a fairly easy way to upload and manipulate content. However, I think it falls short in certain aspects.

  • View existing post titles and links.
    Useful for adding links to other posts when creating a new post.
  • Offline synchronization
    It would be useful to store all posts on a local drive. Each post would be stored within its own directory. This allows additional information to be associated with a post, e.g. coding projects.

In this post I will show how to use the Google API to obtain blog/post information.

In this post

Requirements

The following requirements were obtained by understanding what the API is capable of. The following links give details.

The primary requirements are to access blog post information from Blogger.com using is API (Application Programming Interface).

This can be broken down into subtasks.

  • Get blog summary
    This will include title, description, date published, date last updated, the primary URL, total page and post counts.
  • Get a summary of posts
    Each post summary should contain, as a minimum, the title, url, date published, date last updated.
  • Get post
    Get post should return the HTML content and post summary.
Top

Blogger.com API Basics

The API expects a URL to query blog/post information. The URL must include an API key.

A typical request URL is https://www.googleapis.com/blogger/v3/blogs/{BlogId}?key={Your API key}

BlogId can be found by logging in to Blogger.com and selecting posts (the default when signing in). You should see something like...
https://www.blogger.com/blog/posts/1967019************
The number following /posts/ is the blog id.

To use the Blogger.com API you will need an API key. This is standard practice for online services. An existing blog site is required for this stage. Visit Creating an API key.

The Blogger.com API returns Json assuming a request was successful.

Top
Sunday, 3 September 2023

Simple List Control - Part 1

Overview

In this post I will detail how to create a Windows Forms application that hosts a simple list control. The list control is akin to the ListBox control but developed from scratch. This tutorial will start with basics, creating the necessary control(s), painting and so on. The tutorial will then discuss slightly more advanced topics such as scrolling, paint optimisation, selection and so on.

In this post

Project Creation

We will create a WinForms project to host the simple list control. For this project I am using Visual Studio Community Edition 2022. The project targets .NET Framework 4.8.

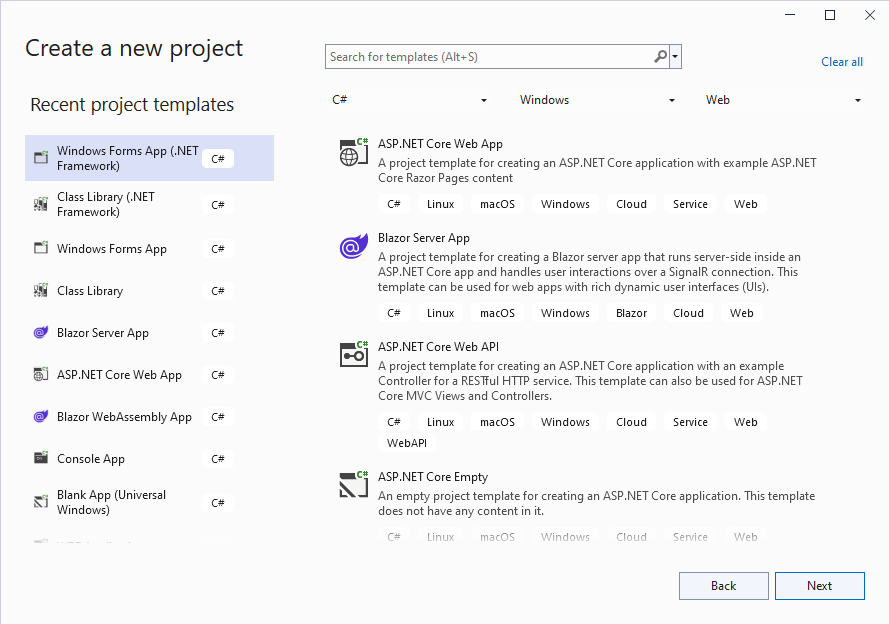
1. Create a new Winforms project (.NET Framework).

Figure 1 - Creating the project

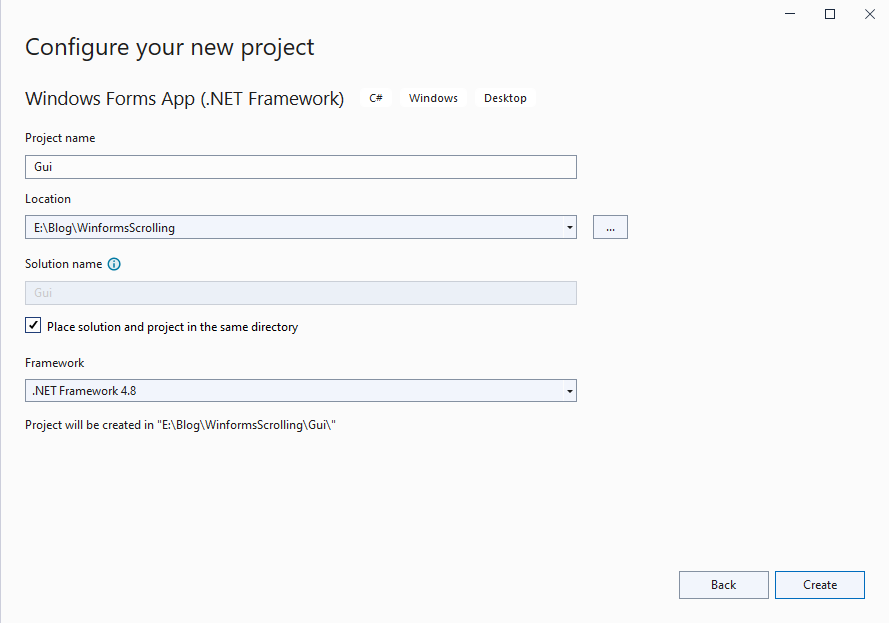
2. Configure the project.

Figure 2 - Configuring the project

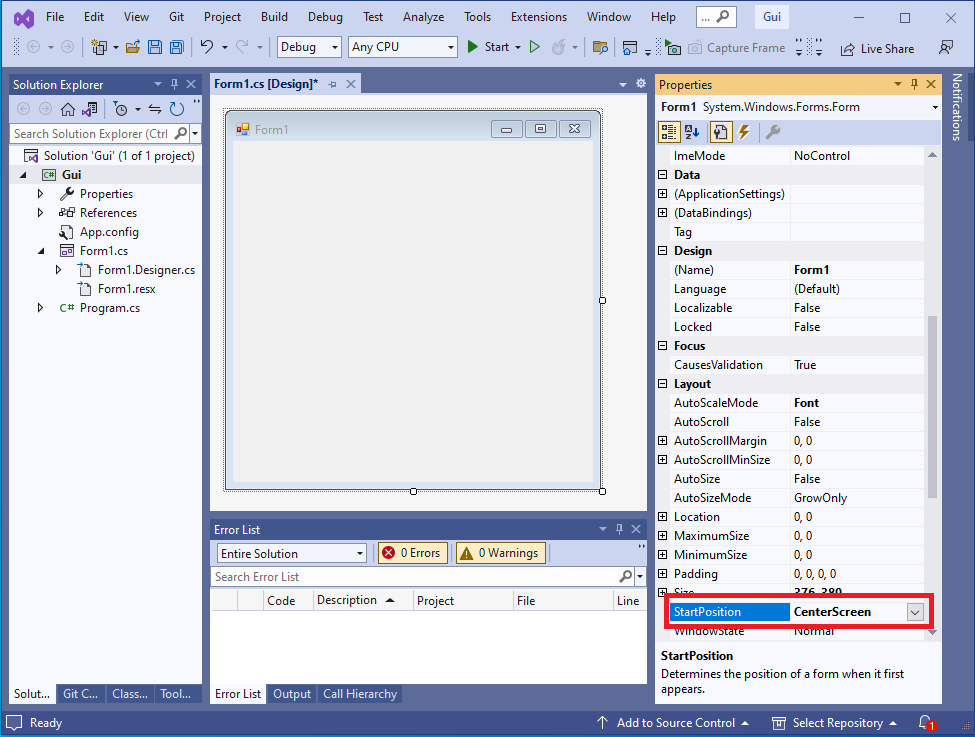
3. Configure the main form properties.

This step is optional, the defaults will suffice. I prefer to ensure that the form will display center screen.

Figure 3 - Configuring the main form
Top

Adding A User Control

A User Control will be used to host the simple list control. The control will implement painting, scrolling, selection and so on.

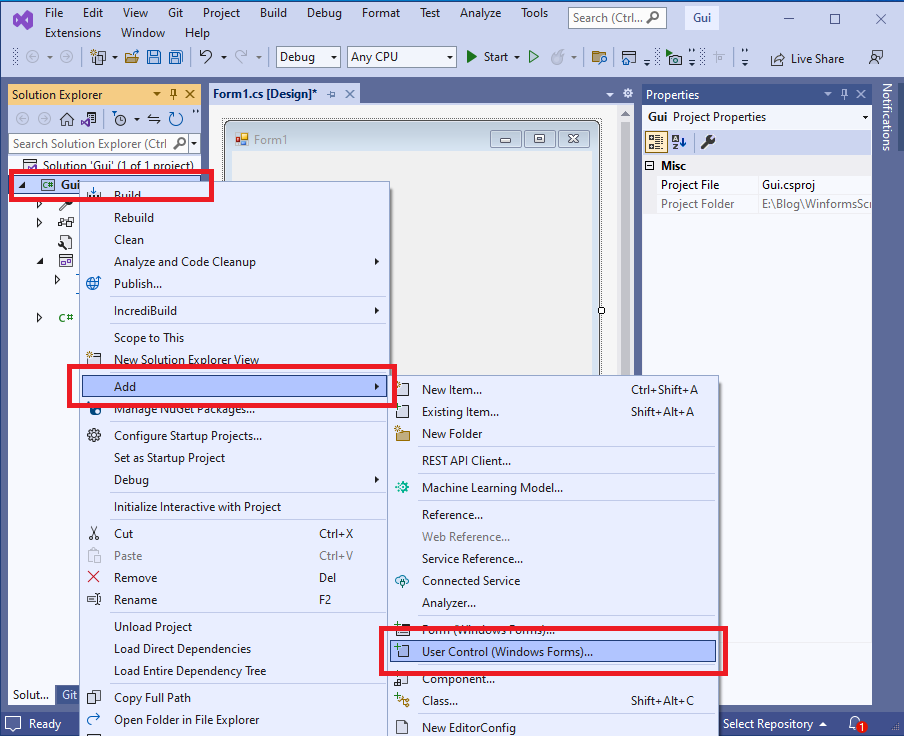
1. Add a new user control

Figure 4 - Add a new user control

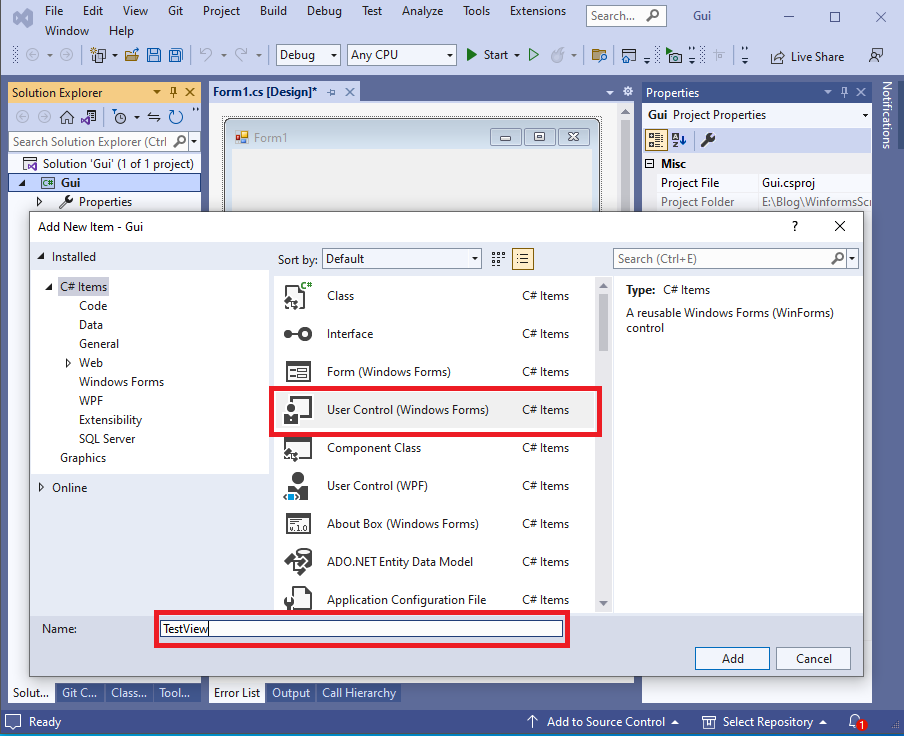
2. Name the user control

I've chosen to name the control TestView. You can name the control anything you wish. However, you will need to make changes to subsequent code to reflect your chosen name.

Figure 5 - Name the new user control

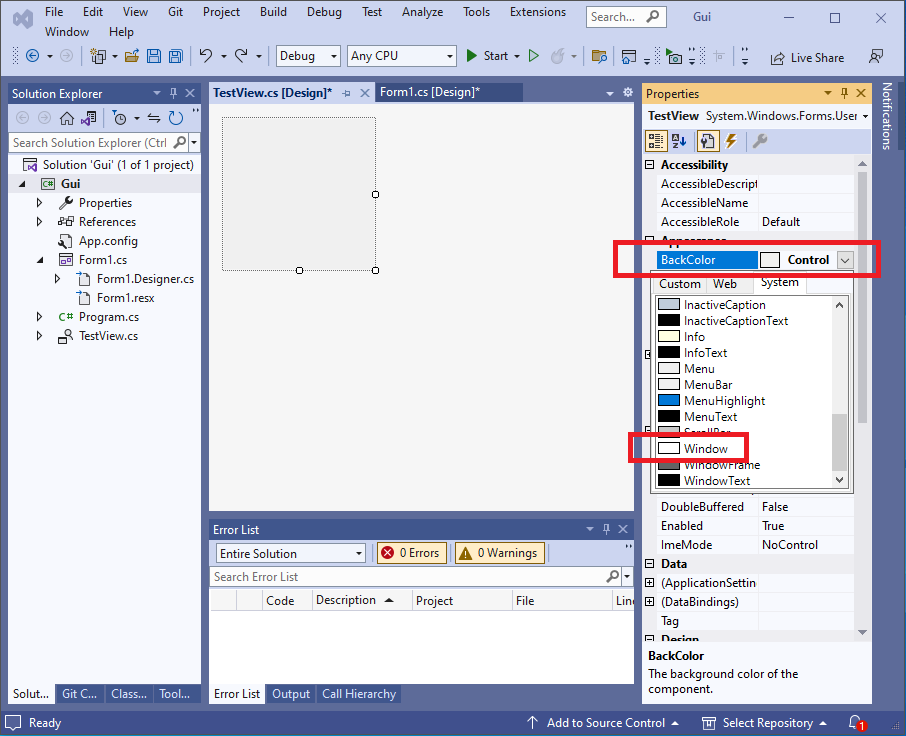
3. Configure the user control

To configure the user control, simply change the background colour to Window (default colour being white).

Figure 6 - Configure the user control
Top

Adding The User Control To The Main Form

1. First build the project to ensure the the user control is ready for use. In Solution Explorer, right-click the Gui project the select build or press the F6 key.

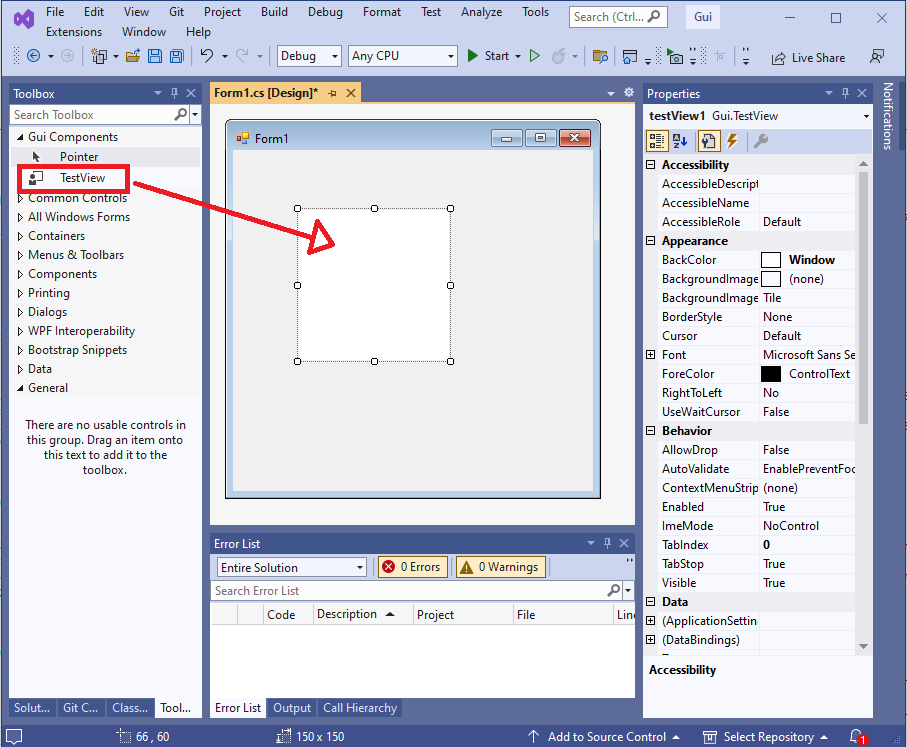
2. Switch to the Toolbox tab and drag the TestView component to the main form.

Figure 7 - Main form hosting the user control

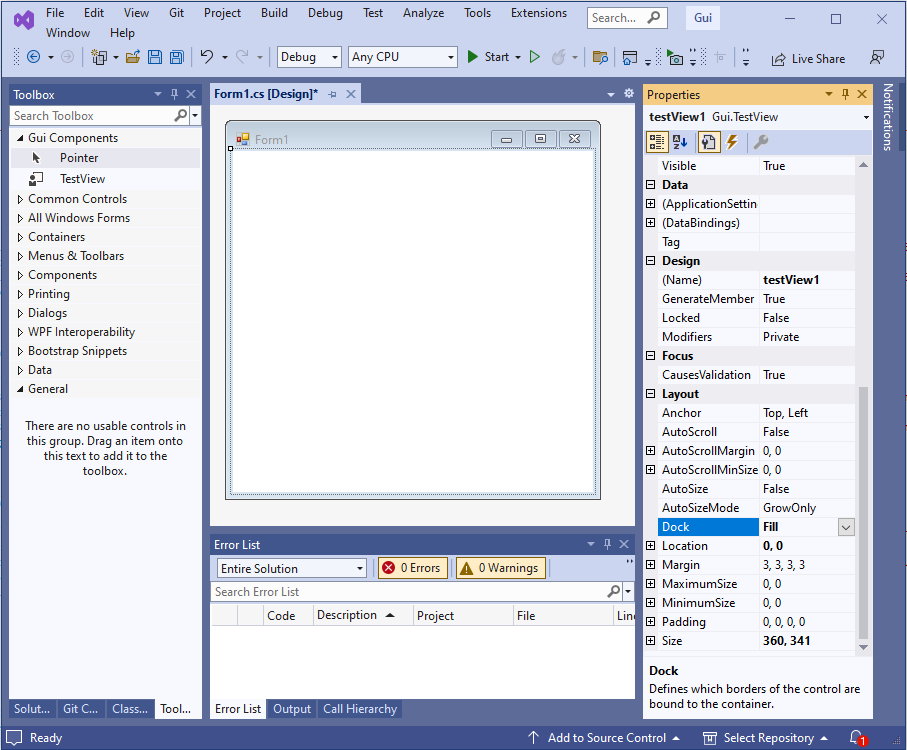
3. Finally, select the user control then select the dock property and change to Fill.

Figure 8 - User control docked to main form
Top

Summary

In this post I described the initial steps for creating a simple list control. To ensure the post does not become to long, I concentrated on creating and configuring the project. I then proceeded to add a user control that will house the list control's functionality. In the next post we will start writing code to implement list view functionality.

Top